Hogwarts Castle Domed Roofs
(As usual, all the images are clickable to get a larger view of the shots).
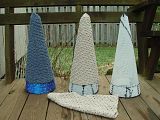
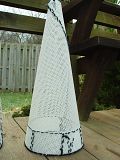
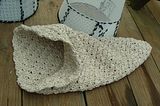
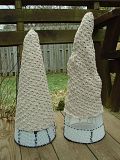
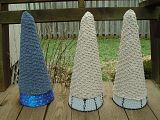
The first shot shows the stages the cone goes through. First I had to make the cone, (which wasn't easy for me to figure out!) I finally got some posterboard, made a cone shape, cut the excess, and then used that as a template for the plastic canvas. I also had to make a ring of plastic canvas which is at the base of the cone. This part should slip into the castle towers, having the cone be the only visable part when done.
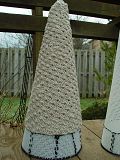
I made the crocheted sleeves using a shell stitch this time. The castle instructions called for a different type, but it was very pourous and the plastic canvas showed through too much and I didn't want to have to fill in all the holes, (like I did with the castle walls), because that takes up way too much time. Besides, I thought the shell stitch looked more like roof tiles.
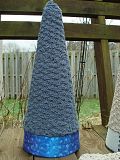
I took two shots of putting on the sleeve over the last cone so you could see how it fits on. I need to stitch down this last sleeve, (just using the same colored thread and a yarn needle), so that the sleeve stays put.
Then I will need to add the fabric trim at the bottom. The blue cone is already done. The two inner towers will have the blue roofs. The four outer towers will have the linen marl colored roofs.
Once this is done, I still need to figure out a way to have the cones stay atop the towers and not slip into them. I'm thinking of using S hooks (although my hubby says the castle shouldn't have any sharp objects on it.) Maybe pipe cleaners bent into S hooks? I don't know. Still thinking this one out.
I need to make one more roof and that will be for the Great Hall part of the castle which you haven't seen yet. It is not a dome shape, but a pitched roof shape. It will also be removable.
I can't wait to get that part done so you all can see this room!
It's lined with the same House-Shield fabric I lined the Snape bag with. Very cool!
Then, I will need to attach the castle walls to the outer towers. (Another challenge), as I want to make the front gate wall open up so a child can "enter" the grounds and it will be easier to play with the dolls inside the towers. I'm thinking again of some type of hooks which can allow the front wall to become detatched on one side. I don't know how yet. Still thinking about it.
The castle walls are pretty heavy and may need some shoring up as well. Maybe wire or wood dowels inserted between the fabric and crochet. But then I need to worry about sharp objects again.
Hmmm, this is really a work in progress, isn't it? I feel like the builders of the Leaning Tower of Pisa who had to keep altering their plans as the ground shifted while it was being built, and their tower slowly sank into the mud. LOL!!!!

 I Get By With A Little Help From My Friends
 If you know of any more Harry Potter related craft patterns or projects, please let me know and I will add them to the list!


2 Comments:
About the towers, you could make a narrow rim on the inside (out of plastic canvas or something else) that the roof pieces can rest on.
By noricum, at 10:11 AM
Hi Noricum!
Well, I had thought of that, but, the walls of the tower are curved and it would be very difficult to make a continuous "ridge" around the innner tower.
A segmented ledge could work, however, I already lined the towers with fabric.
Making a shelf would mean stabbing into the fabric liner possibly causing the fabric to tear.
By Becky, at 4:40 AM
Post a Comment
<< Home